How to Upload Article in Google Scholar
Whether you’re a researcher, academic, or student, getting your work recognized and accessible online is a key step in building your academic profile. One of the most effective platforms for this purpose is Google Scholar. But for many new authors, a common question arises — how to upload article in Google Scholar?
In this comprehensive guide, we’ll walk you through the process of uploading your scholarly article to Google Scholar, explain what you need before getting started, and provide tips to improve your article’s visibility. By the end of this article, you’ll know exactly how to make your research accessible to a wider audience through Google Scholar.
What is Google Scholar?
Google Scholar is a free web search engine developed by Google that indexes scholarly articles across various disciplines and sources. It includes peer-reviewed papers, theses, preprints, conference proceedings, and books from academic publishers, professional societies, online repositories, and universities.
Unlike traditional academic databases like Scopus or Web of Science, Google Scholar is open to everyone and uses Google’s powerful search algorithms to provide relevant academic results.
Why Upload to Google Scholar?
Uploading your article to Google Scholar provides several benefits:
-
Increased Visibility: Your research becomes easily discoverable to scholars, students, and professionals worldwide.
-
Citation Tracking: You can track how often your work is cited and monitor its impact.
-
Academic Credibility: A well-maintained Google Scholar profile reflects your academic contributions.
-
Easy Integration: It pulls articles automatically from trusted repositories.
But here’s the catch — you cannot upload articles directly to Google Scholar like you would to a social media platform. Instead, it indexes content from credible academic sources. So, uploading an article involves a few indirect but structured steps.
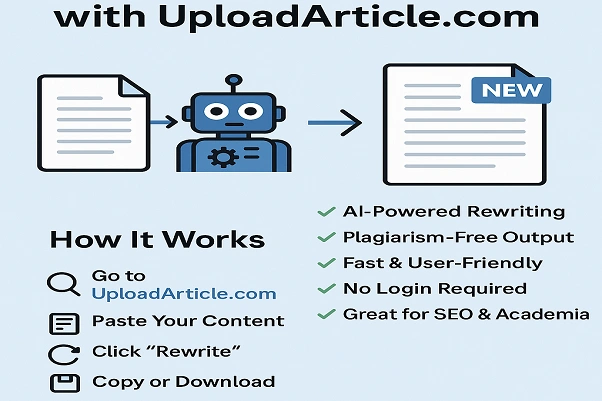
Read More : uploadarticle.com
Step-by-Step Guide: How to Upload Article in Google Scholar
Let’s go through each step clearly to make the process user-friendly.
Step 1: Create a Google Scholar Profile
Before uploading anything, you need to set up a Google Scholar Author Profile.
-
Go to Google Scholar.
-
Click on “My profile” in the top right corner.
-
Sign in with your Google account (preferably your academic or institutional email).
-
Fill in the required information:
-
Name
-
Affiliation (University or Institution)
-
Research interests
-
University email (for verification)
-
-
Choose your update preference:
-
Auto updates: Google adds articles it thinks are yours.
-
Manual updates: You get to approve articles before they are added.
-
Once your profile is created and verified (especially with an academic email), you’re ready to manage your publications.
Step 2: Prepare Your Article for Upload
Since Google Scholar doesn’t allow direct uploads, your article must be hosted on a trusted academic source. Here are some options:
a) Institutional Repositories
Most universities provide digital repositories for faculty and student research. For example:
-
Harvard’s DASH
-
MIT DSpace
-
University of Oxford Research Archive
b) Preprint Servers
If your article isn’t yet peer-reviewed, you can upload it to platforms like:
-
arXiv (for physics, math, computer science)
-
SSRN (for social sciences)
-
bioRxiv (for biology)
c) Personal Website or Blog (with caution)
You can upload a PDF version of your article to your personal site, but ensure:
-
It is publicly accessible (not behind a login).
-
The full text is available.
-
It includes metadata (title, author name, abstract, etc.).
Note: Google Scholar’s crawler checks for scholarly formatting. A random blog post or hidden PDF likely won’t be indexed.
Step 3: Upload Your Article to a Recognized Repository
Choose a repository based on your field and status of the article (preprint, postprint, published version). Here’s a quick example of how to upload:
Uploading to arXiv:
-
Create an account at arXiv.org.
-
Click “Submit” and choose the category.
-
Upload your manuscript, source files, and metadata.
-
Wait for moderation and approval (usually 1–3 days).
Once live, your article is publicly available and eligible to be indexed by Google Scholar.
Step 4: Link the Article to Your Scholar Profile
After your article is indexed (can take a few days), it may automatically appear in your Google Scholar profile — especially if your name and affiliation match.
If not, you can manually add it:
-
Log in to your Google Scholar profile.
-
Click the “+” icon to add articles.
-
Choose “Add article manually.”
-
Enter all bibliographic details:
-
Title
-
Authors
-
Journal name
-
Volume, issue, year
-
DOI (if available)
-
-
Click “Save.”
This manual method won’t help if the article isn’t hosted on an indexed site, so ensure your hosting source is recognized.
Tips to Ensure Your Article Gets Indexed
To make sure Google Scholar finds and includes your article:
-
Use standard scholarly formats like PDF.
-
Include proper metadata in the header or body of your document.
-
Make the file publicly accessible, not behind a login or paywall.
-
Use academic language and structure — abstract, references, etc.
-
Upload your article to recognized platforms.
Read More : uploadarticle. com hot
How Long Does It Take to Get Indexed?
It typically takes a few days to a couple of weeks for Google Scholar to crawl new content. Keep checking your profile for updates. If it doesn’t appear, revisit your hosting platform or metadata.
Common Mistakes to Avoid
-
Uploading only on social media or file-sharing sites like Dropbox or Google Drive — these won’t be indexed.
-
Missing metadata like author names or abstract.
-
Private or paywalled PDFs — Google Scholar cannot access these.
-
Using incorrect formatting — always use academic paper standards.
LSI Keywords and Concepts Covered
In this article, we’ve also covered related concepts and LSI (Latent Semantic Indexing) keywords such as:
-
Upload research paper to Google Scholar
-
Google Scholar profile setup
-
Academic indexing
-
Open-access repositories
-
Preprint servers
-
Scholar article visibility
-
Metadata optimization
-
Research publication visibility
Conclusion
Learning how to upload article in Google Scholar is essential for any academic looking to boost visibility and track citations. While you can’t directly upload to Google Scholar, the process becomes straightforward once you understand how it works: create a profile, host your article on a recognized academic platform, and ensure it’s properly formatted.
Read More : uploadarticle.blogspot.com
FAQs About Uploading Articles to Google Scholar
1. Can I upload a PDF directly to Google Scholar?
No, Google Scholar does not allow direct PDF uploads. Instead, you should host your PDF on a public academic website or repository that Google Scholar crawls and indexes.
2. How long does it take for my article to appear in Google Scholar?
It usually takes a few days to a couple of weeks for Google Scholar to index content from academic repositories. However, indexing speed may vary based on the platform and formatting.
3. Is it necessary to have an academic email to create a Google Scholar profile?
While not strictly necessary, having an academic email helps verify your profile and adds credibility. It may also improve the accuracy of automatic indexing.